
The first major redesign of the Game Boy Advance changed the system to a clamshell design and also added a rechargeable lithium-ion battery. The biggest difference however was the addition of a front light to the screen. Excluding the somewhat rare Japanese exclusive Game Boy Light, this was Nintendo’s first handheld with an internally lit screen. This system also switched from rubber membrane buttons, common on almost all Nintendo systems to this point, to dome tact switches. One common complaint about this system has been the removal of the headphone jack and the need of an adapter which plugs into the charger port, similar to modern smartphones.
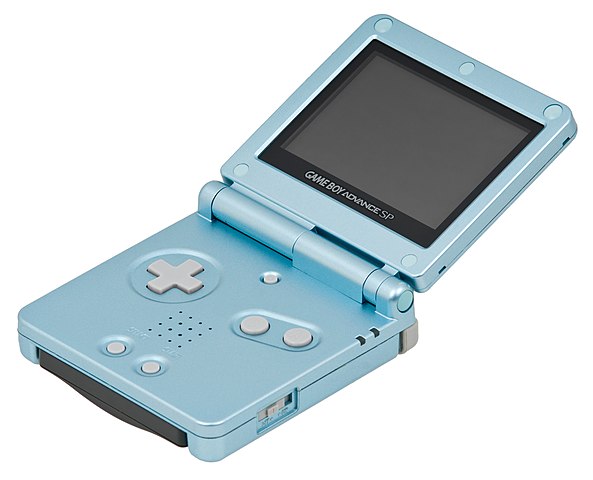
101 Revision Nearly Identical to the original Game Boy Advance SP, the revised 101 model finally added the much sought after backlit screen to the Game Boy line. Interestingly, this model debuted almost a full year after the release of the Nintendo DS but mainly in North America, European/Australian systems are extremely rare and Japan never got the revision. Although sold in large numbers, the backlit screen of this SP makes this model one of the most sought-after models of Game Boy, consequently its current price is usually higher than that of other Game Boy models. Exacerbating this price increase is the fact that many systems have been taken apart for their valuable screens.
Table of Contents:
Last Content Revision: 2023-04
Mods
Backlight Kits - Spring 2023
The below list shows only the current or relevant backlight kits for the GBA SP. For a more information visit the comprehensive guide from /u/Admiral_Butter_Crust (makho).
- FunnyPlaying Laminated 3.0” IPS Kit. The successor to the reliable 9380 kit using a new IPS panel. Soldering is optional, but required for brightness button control. Shell cuts are required to fit in OEM and OEM-mold aftermarket shells. Fits IPS-ready shells from various vendors. [Video Guide]
- Sold at FunnyPlaying, Retro Game Repair Shop, Zedlabz.
- FunnyPlaying Laminated ITA Kit. Using the DSi panel, this kit looks very similar to an AGS-101 for a more original backlit look. Requires soldering for panel installation. Requires FunnyPlaying’s shell. [Video Guide]
- Sold at FunnyPlaying, Retro Game Repair Shop.
- Hispeedido Laminated IPS TV-out Kit. Laminated 9380 panel with brightness control, color palette, composite video out through a custom cable. Soldering is required for this kit. Shell cuts are required to fit the panel. [Video Guide]
- Sold at AliExpress and Retro Game Repair Shop.
- Cloud Game Store Laminated IPS Kit. Laminated custom panel with brightness control, color palette, pixel grid effects. Soldering is required for this kit. Shell cuts are required to fit the panel. [Video Guide].
- Sold at Cloud Game Store and Retro Game Repair Shop.
- Hispeedido HDMI-Out Add-on Board. Using an additional board held in the top screen shell, this kit allows for micro-HDMI out from the top shell. This requires shell cuts and is only compatible with a specific set of backlight kits.
- Sold at AliExpress and Retro Game Repair Shop.
Consolizer Mods
The portable Game Boy Advance SP can be converted to a TV connected console for HD game play. These are considered advanced mods.
- GBAHD from zwenergy. This project utilizes a Spartan Edge Accelerator FPGA development board and outputs scaled 720p or 1080p image out of the onboard micro-HDMI. The repo lists information for manual wiring.
- Mancloud has a shield design that allows for a more streamlined build. A matching shell from jotheripper is also available to print. A complete kit is sold by Retro Upgrades UK without the shell.
- GBHD Advance SP from GameBox Systems. Utilizing a custom FPGA board, this kit can be purchased as a DIY parts kit or fully assembled.
Battery and Charge Mods
- Replacement Batteries. Note many replacement batteries have misleading or completely false capacity ratings. Below have been tested and confirmed.
- Mahko Battery. Based around a custom PCB that allows the use of 603048 pouch lithium battery. Soldering is required. This may be purchased in several ways. Self assembly using gerbers from the Github repo, self assembly using parts from Retro Game Repair Shop, or pre-assembled with a 3D printed frame from RetroModding. [Video Guide]
- Helder MegaBat800. A fully assembled battery that can be dropped in without modification. The battery is shorter than the original cell so the included spacer is required. Sold by Helder, RetroModding, and ZedLabz.
- “High Capacity Battery Pack”. A drop-in battery that fits like OEM. The quality of this battery is better than most aftermarket cells. The capacity has varied, but still is consistently higher than OEM. Sold at Retro Game Repair Shop.
- Batteries from other Nintendo consoles should not be done any longer. There are no new stock of these cells and they are too old to be considered safe and reliable. Only for the sake of documentation, Nintendo DS batteries are the same shape and rating as the SP but with alignment pegs in the wrong place. The pegs may be cut off. DSi batteries are a possible solution, but extensive shell cuts are required. This is not a recommended mod. Full drop in batteries with respectable capacities are still manufactured.
- Batteries added to the top shell. This fits two additional cells of different sizes into the top shell in the space gained by using an IPS kit. This method should be done with caution as there is no balance charging of these multiple cells.
- EXT2/ Charge port replacement. The EXT2 port on the SP handles charging and headphone audio via a dongle. As the original charger is a nominal 5V, it has become common to replace the port completely with a USB-C port. All mods require a filler spacer.
- rorosaurus has an open source design that simply allows for charging. Includes the necessary CC1/CC2 pulldown resistors for USB-C to C cable compatibilty. [Video Guide]
- Alternatively sold on Retro Game Repair Shop
- Alternate centered version. This version places the port in a more centered location to the shell opening. Requires manual assembly of the two boards as well as reusing parts of the original port. Follow the instructions and reference on the OSHPark page for ordering. An alternate filler is required. The filler can be printed by JLCPCB in nylon for a smooth OEM-look.
- Giltesa USB-C Charge and Audio Mod. There are two versions of this mod; a standard version and a centered version. Both are electrically the same, but the centered version offers extra clearance for shell mods such as the Slate.
- Standard version sold at Giltesa, Retro Game Repair Shop, Zedlabs. [Video Guide]
- Centered version sold at Giltesa, Retro Game Repair Shop. [Video Guide]
- FunnyPlaying USB-C Charge and Audio Mod. This is a centered-port mod with a color matched shell insert to FunnyPlaying’s shell colors. [Video Guide]
- Sold at FunnyPlaying, Retro Game Repair Shop.
- Analog Audio USB-C adapters are required for both Giltesa and FunnyPlaying versions of the mod. The AGS does not output digital audio, and the ports use an alternate analog audio standard of USB-C utilizing the SBU/CC pin. Therefore only analog audio out dongles are compatible and USB-C-to-C connectors only work in one orientation.
- Sold from various AliExpress vendors. Audio Only and Audio and Charge.
- rorosaurus has an open source design that simply allows for charging. Includes the necessary CC1/CC2 pulldown resistors for USB-C to C cable compatibilty. [Video Guide]
Audio Mods
A note that applies to all consoles. Amplifiers will amplify noise that is inherent to the system.
- Internal headphone jack mod. As the AGS did not have a headphone jack, this can be added back. Please note that there are several methods listed in this repository, some that have a misunderstanding of the DC bias and blocking AGND capacitor. Keep in mind to prevent damage to headphones.
- Helder SP Flex Amp. A unique board design that offers 1.5W of output. As there are different board revisions of the AGS/AGT, follow the instructions on the listing for your board revision.
- Note on “Power Cleaners”. These mods from various vendors often result in more issues than they resolve, especially for beginner modders. Consider cleaning the power switch properly, cleaning the volume wheel with contact cleaner, and replacing the capacitors if deemed faulty. These mods should not be considered unless other repairs have been performed first.
Other Mods
- Shell Replacments. The AGS has a complex design that makes manufacturing accurate shells incredibly complex. The typical issues are notable gaps around the body seams or general warping that requires overtightening of screws. In general, solid color shells or replica limited edition shells have these issues and poor quality.
- “IPS Ready” Shells. These are new mold shells that have the top shell pre-molded to accept IPS screens. These are still compatible with original 001 and 101 screens. Sold at AliExpress, Retro Game Repair Shop, and RetroModding. [Video Guide]
- ExtremeRate makes a IPS-ready shell with very good tolerances and body seams. The colors are limited and the solid color shells are either soft touch or painted. Solid Color and Transparent. [Video Guide]
- FunnyPlaying makes a IPS/ITA-ready shell with very good overall quality and tight body seams. Colors are currently limited and the shell is a high gloss and not OEM textured. Sold at Funnyplaying, Retro Game Repair Shop, Zedlabz.
- Makho/RetroCNC SLATE. A hingless aluminum front shell replacement. The end formfactor is similar to a Game Boy Pocket. This mod requires the use of a matching laminated IPS kit. The rear shell can be reused from the original console or various aftermarket shells. The design also allows the use of OEM or aftermarket buttons. [Video Guide]
- XIPHER Slab. A fully 3D printable hingeless SP designed to flip the motherboard to have the cartridge removed from the top. A very unique concept and design that requires intermediate level modding skill. This can be FDM and SLA printed. [Video Guide]
- Boxy Pixel Unhinged. There are two versions currently available. The design requires the use of mostly Boxy Pixel parts and accessories. The end formfactor is similar to a Game Boy DMG. [Video Guide]
- LED Mods
- “AGS-010” is an older mod done to AGS-001 SPs to increase the brightness of the front light. [Written Guide]
- AGS-101 into a -001 is an older mod to replace the frontlight screen with the AGS-101 backlit screen. A voltage regulator and brightness controller is required to make the system perform as original. This has been largely made obsolete by modern IPS replacements. This mod may also be used with the “IPS-101” clone screen. [Video Guide]
- BennVenn NDSL LCD Kit Update 03/2019. A prototype design for the Nintendo DS Lite lower screen has been worked on. Soon^^TM
- CPU Overclock. As with other consoles, the clock can be overclocked to speed up slow movement games.
- InsideGadgets ClkxCtrl. Requires fine soldering and complex wire routing. [Video Guide]
- Dual Clock Switch Mod. Using two crystals and a toggle switch to change between them. [Written Guide]
Problems
Don’t forget that the common problems section also has more info, such as failure to power-on or common audio issues.
Cracked Shell
Some late model AGS and early Nintendo DS consoles were made with defective plastics that tend to get extremely brittle over time. This issue seems most prevalent with Pearl color AGS-101 consoles but may affect Graphite AGS-101 consoles or other late model units. The pale green on the inside of the shell plastic is a known indicator of these defective plastics. See this imgur album for more information.
Power Issues
Charging issues, power on issues, flickering LEDs.
Dirty or damaged power switch.
The Game Boy Advance SP power LED is always RED even on new batteries or LED will flicker/ will restart randomly or if jolted.
- The most effective method to clean the power switch is to disassemble the switch and ensure everything is clean. Remove all the oxidation and carbon buildup from the inside-out. Opening the switch is the most reliable and best long term solution. Other methods may still help, but should be considered a temporary fix. [Video Guide]
- Aftermarket Replacement Power Switch. This could be an alternative to an actual proper cleaning, when the power switch is corroded beyond repair. Moderate soldering skill required. [Video Guide]
Bad Batteries
With a multimeter, check the voltage on the battery, ensuring it is over 3.4 volts. If it is under 3 volts, recycle the battery and purchase a new one. If it is over 3 volts, you likely have another issue but the console will not boot unless the battery is at least 3.4 volts. If you do not have a multimeter, you can try to purchase a new battery but do be aware that the aftermarket cells are usually only 400-700 mAh despite what they may claim. Check the Mods section for further explanation of the list below.
- Mahko Battery. Retro Game Repair Shop, or pre-assembled with a 3D printed frame from RetroModding
- Helder MegaBat800. Sold by Helder, RetroModding, and ZedLabz.
- “High Capacity Battery Pack”
Charging Issues
When attempting to charge the console, the charge light does not come on at all or only comes on for a second before turning off. Refer to the schematics and the EXT2 pinout.
- Bad EXT2 Port. A quick voltage check on the VIN pin 2 on the motherboard will determine if ~5V is coming to the system.
- Rule out a bad charger with a cheap USB cable. Sold on AliExpress, Retro Game Repair Shop, RetroModding, and ZedLabz.
- Replacements ports are available but the pin spacing is incorrect. You will need to bend the pins to make fit correctly. Replacement port video guide. Alternatively USB-C mods can replace the port completely.
- Charge Circuit Issues. If neither a new battery or charger helped, you’ll need to take apart the console. If the water indicator sticker (a white square with pink dots, should be on the bottom of the PCB near the power switch) is tripped (appears solid red or pink or is missing entirely) or if you see any corrosion or other signs of water damage, you may wish to take pictures and consult help.
- EM8. If the orange charge light does not come on at all and you’ve ruled out the power adapter, or the charge light comes on for a second and turns off and you’ve ruled out the battery, the issue may be the port itself or the EM8 filter near the charge port. You’ll need to perform a visual inspection of the port itself and the PCB around the port for anything that looks off. If you do not see any obvious issues, you’ll need to plug in the console while you have it disassembled and try and trace the power lines from the port with a multimeter. If you see power at the port and no where else, you should try to reflow the solder on the pins. To narrow down if the issue is with EM8, typically one can just apply pressure to the component (with your fingers) and plug the console in with a battery. The common mode choke sometimes will have cracked solder joints or have been physically damaged or cracked. Replacements are available in the parts list. [Video Guide]
- Fuses F1 and F2. If the charge light comes on for a second and shuts off and you’ve already ruled out the battery, this could indicate a blown fuse. Does your console boot normally? If the console does not boot on a known (or at least assumed) good battery, you’ll need to check the component F1. This is a surface mount fuse and it is located on the front of the PCB right underneath the A and B buttons. With your multimeter, check and see if you have continuity across the component. If not, you’ll need to replace this fuse. If the charge light does not come on at all and you’ve ruled out the power adapter, the issue may be with the component F2. F2 is a small surface mount fuse located near the link port on the back of the PCB. With your multimeter, check and see if you have continuity across the component. If not, you’ll need to replace this fuse. F2 typically blows when there is a short across the charge port or if the batteries are installed with reversed polarity.
- The path of the charge circuit runs directly next to the speaker hole so it is easy for liquids to get trapped and those traces to get compromised. You can use a multimeter to probe continuity from D1 to F2. If you identify a break in the line, a jumper wire between these two components may resolve the issue with the charge circuit. There may be additional components between D1 and F2 based on the board revision you are looking at, please refer to the schematics and do your own visual inspection of the traces on your board to confirm if there are any further breaks that require repair.
Bad Hinges
Note that there are a few revisions of the hinge. Consoles that have latches that are black or white have left/right orientation when installed. Black hinge on the left, white hinge on the right. [Written Guide] or [video guide]
- 3D printable hinge removal tool from makho. [Video Guide]
Bad Shoulder Buttons
The switch componenent on the SP will become dirty or damaged under heavy use.
- Like the power switch, the internals of the shoulder buttons tend to accumulate build-up and no longer make electrical contact when actuated. The black silicone dome is delicate and can rip when being removed. Proceed with caution.
- Replacement switches are sold by several vendors. Check the replacement parts sheet for options.