
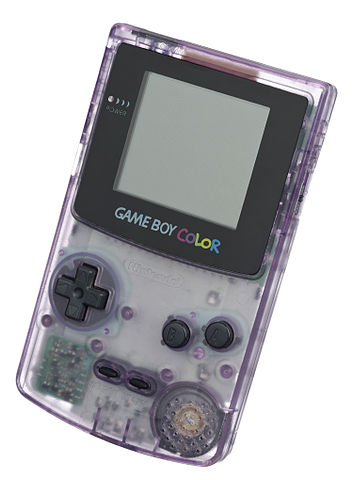
The Game Boy Color was the first major hardware revision to the Game Boy line, with improved hardware and a full colour screen. This system was more a hardware refresh than a subsequent model and had full backward compatibility with all original Game Boy games, with the ability to apply some basic color palettes to different elements. When starting original Game Boy games, the player can use different button combinations to change the colours on the screen, or to the original greyscale. This does not apply to Game Boy Color games. Below is a list of combinations:
| D-Pad | None (Default) | A | B |
| Up | Brown | Red | Dark Brown |
| Down | Pastel Mix | Orange | Yellow |
| Left | Blue | Dark Blue | Grayscale |
| Right | Green | Dark Green | Inverted |
Last Content Revision: 2023-01-11
Table of Contents:
Mods
Backlight Kits - Winter 2022
Flustered by this backlight list? Why not check out this more comprehensive guide from /u/Admiral_Butter_Crust on all the different backlight kits for CGB. Only current or relevant backlight kits are listed below, sorted by desirable features.
- FunnyPlaying Game Boy Color 2.0 Q5 IPS Laminated IPS Kit. Larger than stock viewing window using a custom laminated Q5 LCD panel. Requires a matching FunnyPlaying shell or extensive shell cuts to fit. Soldering is not currently required on kits sold after Summer 2022. However soldering is required for higher brightness and logo color control. [Video Guide]
- Cloud Game Store 2.6” IPS Kit. Larger than stock viewing window that requires a matching lens. Shell cutting is required to fit into OEM shells, but a matching shell is available and does not require cutting. Soldering is required for power. Brightness control and pixel grid effects are controlled by onboard touch sensor. [Video Guide]
- Shell note. The matching shell is a smooth, glossy texture, unlike original Nintendo shells or FunnyPlaying shells. Sold at Cloud Game Store and Retro Game Repair Shop.
- IPS kit sold at Cloud Game Store and Retro Game Repair Shop.
- A new laminated version with a matching shell is currently available. Currently only available in one lens color and two shell colors. Cloud Game Store
- One Chip OSD Q5 IPS Kit. Larger than stock viewing window using the Q5 LCD panel and includes lens with larger viewing window. Required shell cuts identical to the FunnyPlaying Q5 XL kit. Soldering is required for the OSD controls. OSD allows for vertical and horizontal alignment, allowing less than perfect shell cuts to recenter image.
- Sold at Retro Game Repair Shop and AliExpress.
- 3D printed centering brackets are available from Retro Modding. [Video Guide]
- A new version with HDMI out has been released. Soldering is required and shell modifications are required. Sold at AliExpress and Retro Game Repair Shop. [Video Guide]
- Cloud Game Store 2.45” kit TN panel that retains the original viewing window. Requires no shell cuts and fits in the original screen opening. Requires one soldering point for power. Brightness and pixel grid effect are controlled by onboard touch sensor. Superior to the 690 TFT kit as it retains the original viewing window and easier to align. [Video Guide]
- Sold at Cloud Game Store and Retro Game Repair Shop.
- A laminated version of this kit is currently available and requires shell cutting. Sold at Retro Game Repair Shop
- Shell Note. ExtremeRate makes a unique shell that accomodates 3 different screens: OEM, 9380, Q5. Shells are not compatible with any laminated kit without shell cuts. These shells have cut points that allow for this versatility. The shells are high quality, but the solid color shells are painted or plated and may possibly fade over time. Sold on Amazon Clear and Solid. [Video Guide].
- **
Audio Mods
- Prosound. A common mod to improve the sound quality from the Game Boy Color headphone jack. This mod requires on a clean volume wheel for optimal results.
- Written guide and Video Guide
- Helder’s alternative wiring. This method removes RA2 and joins a set of vias with jumper wires. As there is fine soldering, this mod is considered more difficult. Like the standard Prosound mod, this bridges the volume wheel to the headphone jack and bypasses the onboard amplifier. For best results, the volume wheel should be cleaned out with isopropyl alcohol or contact cleaner.
- Amplifiers are not typically recommended. As with other consoles, amplifiers amplify system noise. If the speaker is not working or low, please refer to Common Problems.
- These are sold by various vendors. RetroModding, Cloud Game Store, and Retro Game Repair Shop.
Battery and Power Mods
- USB rechargeable batteries. Adding a modern necessity to a classic console. Longer battery life is not guaranteed, but adds some convenience. Note that is is based on the TP4056 and this does not support play and charge. Caution should be taken with lithium batteries.
- Video guide. Caution should be taken with the TP4056 module and lithium batteries. This mod requires significant shell cuts. Requires moderate soldering skills and electronics understanding. TP4056 modules are available with Type-C connectors.
- Giltesa’s USB-C Charging Kit Pro. A very tidy custom TP4056 charge board that replaces the DC jack with a custom USB-C port. This kit removes and replaces the original DC-DC board and not compatible with OEM screens. A battery is not included and can be sized based on the cut of the battery compartment. Moderate cutting can accept a 103050 battery with about 1600mah capacity. Requires high soldering skills with fine case mods. [Video Guide]
- DC jack rechargeable batteries. Keeping the classic ports and feel but adding a modern twist. Requires caution as the board and batteries generate heat.
- Written Guide. An advanced method of charging specific lithium batteries in a Game Boy Color. Caution should be taken. Requires shell modification, high level soldering skills, and moderate electronics understanding.
- Esotericsean’s Alternative NiMH method. Using a different charge controller and standard NiMHs, a safer method is achieved to charge standard NiMH batteries. Alkalines should never be recharged.
- Funnyplaying Rechargable Mod. This mod removes components on the GBC board in order to repurpose the DC jack to allow for 5V input to Funnyplaying’s custom charge board. This board is TP4056 based. [Video Guide]
Other Mods
- LED Case/button mod. Add some unique LED lighting to your Game Boy Color.
- Natalie’s LED Button boards. Preassembled boards that light up the buttons and replaces the power LED. Very simple installation requiring moderate soldering skills. Guide
- Funnyplaying RGB LED Button boards. Preassembled boards that light up the buttons and and have minimal animations. Very simple installation requiring moderate soldering skills. [Video Guide]
- GameBox Systems GBHD Color. An advanced mod that requires a board cut and soldering. This is a great mod for Colors that have corroded bottom halfs due to battery corrosion. Offers 720p 5x scaling with controller support over the SNES port. GameBox Systems [Video Guide]
- Game Boy Pocket buttons in a Color. Don’t like the A/B imprint on the stock buttons? Try Pocket buttons! * Written guide. Minor shell modifications are required.
- Plastic Start/Select buttons. Want the start and select to be plastic to match the other buttons like a SP? Try this mod. These mods require trimming of the membrane
- Written Guide. Requires donor plastic to create a button. No longer the preferred method.
- B23N’s Start/Select Nubs. Can be 3D printed in different materials, but designed to compliment RetroCNC or Boxy Pixel GBC buttons.
- Alternatively RetroCNC and ExtremeRate button kits include matching material start select buttons. RetroCNC buttons are all aluminum and require separate membraes and requires the start/select membranes to be trimmed. ExtremeRate buttons are high quality molded plastic and include membranes with a trimmed start/select membrane to compliment the included plastic start/select nubs.
- Boxy Pixel Machined Aluminum Shell. An all-aluminum replacement shell alternative to the aftermarket plastic shells. Requires moderate modding skills to assemble.
Problems
Don’t forget that the common problems section also has more info, such as failure to power-on or common audio issues.
- Replacement Parts Sheet
- Game Boy Color Schematics and Board Scan
- Game Boy Color Interactive BOM by skimzor based on the CGB-CPU-04
Power Issues
Aside from dead batteries, these are the most common issues that keep all Game Boys from powering on. Troubleshooting Guide
- Dirty or damaged power switch
The most effective method to clean the power switch is to disassemble the switch and ensure everything is clean. Remove all the oxidation and carbon buildup from the inside-out. Opening the switch is the most reliable and best long term solution. Other methods may still help, but should be considered a temporary fix. CGB power switches have a tricky latch when opening up the shield. [Video] Cleaning the power switch is the same method as AGB. [Video]
- Aftermarket Replacement Power Switch. This could be an alternative to an actual proper cleaning, when the power switch is corroded beyond repair. Moderate soldering skill required. Video Guide
- Burnt Fuses
- There are two fuses F1 and F2 on the system of the same value. F1 is the main system fuse, F2 is a protection fuse from the DC jack. Please refer to the Replacement Parts Sheet.
- Corroded DC Jack
- Like other consoles this may prevent a the console from powering on. Check continuity between Pin 2 and 3 of the DC jack P4. Pins are numbered on the button side of the console. Poor continuity or high resistance is a sign of a corroded DC jack. These can be desoldered and cleaned. Open circuit on these pins disconnects the battery circuit and switched to DC power only. Replacements are available on AliExpress.
Audio Issues
- Corrosion in the physical switch in the headphone jack is a common issue. Check continuity between Pin 4 and 5 of the headphone jack. Pins are numbered on the button side of the console. Poor continuity or high resistance is a sign of a corroded DC jack. Thse can be desoldered to be cleaned. Open circuit on these pin mutes the speaker.
- Dead speakers can be replaced as there are OEM-fit aftermarket replacements. For Game Boy Colors, BennVenn explains that speakers that go bad are usually a sign that the capacitors should be changed.
- Replacement speakers are available from FunnyPlaying and Cloud Game Store. FunnyPlaying speakers are clear. Cloud Game Store speakers are available in multiple colors.
- FunnyPlaying also sold on RetroModding, Retro Game Repair Shop, Zedlabz.
- Cloud Game Store also sold on Retro Game Repair Shop.
- Replacement Capacitors. Video Guide
- Replacement capacitors can also be ordered in bulk. Specs are available in the Replacement Parts Sheet
- Replacement speakers are available from FunnyPlaying and Cloud Game Store. FunnyPlaying speakers are clear. Cloud Game Store speakers are available in multiple colors.
- Corrosion or other liquid damage when neither the jack nor the speaker is bad. Corrosion in the headphone jack area is common and this can cause a broken connection between the headphone jack and the rest of the system. This will manifest in a perfectly working switch when tested with a multimeter but the console will still not work properly. Diagnosis and repair must be done trace by trace by checking both sides of the PCB simultaneously. Please refer to the Board Scans.