
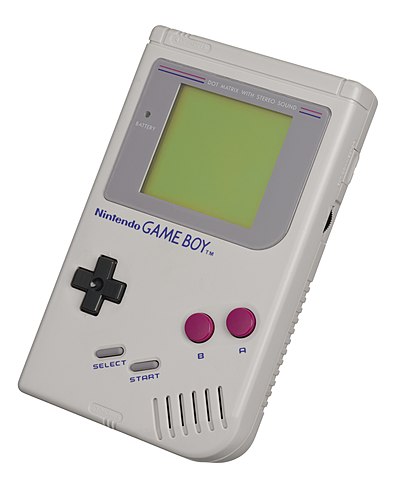
Later nicknamed “DMG” after its product code “Dot Matrix Game”. The original “grey brick” was released in 1989. In 1995 the “Play It Loud” series released. The PIL series only added new shell colours and was not full a hardware revision. PIL consoles use “chip on board” package components and thus the PCBs are covered in epoxy blobs.
Table of Contents:
Last Content Revision: 2020-12-16
Mods
Screen Mods
Looking for a backlight mod? Why not check out this guide from /u/Admiral_Butter_Crust on all the different backlight kits for DMG.
Replacement Screen Kits
- One Chip / HiVision Replacement transflective LCD kit (AIO kit, much smaller than stock, found on aliexpress) - Found a guide you like? Let me (u/Admiral_Butter_Crust) know and I’ll add it, otherwise, see the images on the seller’s page
- “Moon IPS” Replacement LCD kit (from taobao) - Youtube
- Funnyplaying Replacement IPS LCD kit (from Funnyplaying) - Image Guide or video
- One Chip Replacement IPS LCD kit (sold by RGRS and other vendors on ebay/aliexpress) - Image Guide and Video Guide
- v1 kits have a color palette bug and will need a secondary mod as well. See this imagur album or video for more info. Issue is corrected in v2.
- v2 kits are reported to have faulty dpad inputs when installed in some shells with some buttons. Issue is corrected in v3
- v3 is the currently shipping version and is identified by the BLACK PCB and “RIPS V3” markings on the PCB. The LCD is slightly different and such is not compatible with brackets designed for V1 or V2.
- One Chip OSD Q5 IPS Kit (“RIPS v4”, from RGRS) - Youtube
- Replacement stock sized kit (from BennVenn) - coming soon
- BennVenn Replacement transflective LCD kit (Freckleshack v2.5 - Aioli parts from BennVenn) – Kits not yet shipped but install should be similar to AIO kit above due to the reduced PCB size and addition of touch sensor for brightness control
- Replacement 3” screen (stock is 2.4”, parts from BennVenn) - Image Guide
OEM Screen Backlight Mods
- Backlight install (parts: Regular kit from HandHeldLegend or Retromodding or EL Kit from Kitsh-Bent) – Instructables guide/Video guide
- A note on potential issues – Check the problems section above for more info on “Newtonian Rings.”
- Bivert module install (parts: HandHeldLegend) – Video Guide
- Bivert mini module install (parts: Retromodding – Install is largely the same as above module
- Bivert bare chip install (Cheaper generic chips - check ebay or aliexpress) – Instructables guide
- Soft latching bivert install (Switch biversion off and on) – Step by step guide
- RGB backlight DIP switch install – Credit to the_8bit_kingdom
- RGB colour changing backlight – Documented project
Other Mods
- How to change housing/shell – Video Guide
- Prosound mod (parts: Retromodding or Kitsch-Bent) – Simple to follow tutorial/Video Guide
- USB rechargeable batteries – Step by step guide
- Speed up or slow down DMG (under/overclocking) – Written blog post, careful though as the mod is prone to freezing!
- Backlit buttons and case LEDs – Purchasable Kit/Written Guide
- Power LED change (can use colour changing RGBs!) – Brief description of how it’s done, it’s easy to do this one!
- VGA Out (nobble’s DMG Consolizer) - kits shipping and guides coming soon
- Super Game Boy CPU Swap - Info on the mod and tutorial
- Do note that PIL series DMGs have glob-top COB packaged CPUs and are not capable of this mod.
Problems
Don’t forget that the common problems section also has more info, such as failure to power on or speaker issues.
Screen Rot
- What is it? With the classic Game Boy, screen rot can occur just about anywhere on the LCD. Sometimes it’s just a few small specs of black right in the middle of the LCD, sometimes it’s a whole corner of the LCD filled with black splotches. It is NOT mold or water damage, despite what some people will tell you.
- How do I fix it? Unfortunately, there’s no known repair for this other than to just replace the entire LCD board. Unless you have legendary soldering skills, removing the LCD from the board will be quite difficult.
Vertical lines in the LCD
- What are they? This is a VERY common problem with DMGs. These show up as missing vertical lines on the LCD. Sometimes if you press on the rubber strip below the LCD, you can get the lines to disappear for a short period of time.
- How do I fix it? Fortunately, this problem is generally pretty easy to fix. See here or here. One thing worth noting is that you should continue with the iron until you can briefly run the iron across the entire bottom of the LCD and the lines don’t show up anymore. You can get the lines to disappear but until you make sure they stop showing up with heat applied, it won’t be a long-lasting repair. 500° F / 260° C is an adequate amount of heat to use.
Horizontal lines in the LCD
- What are they? Not nearly as common a problem as vertical lines, but they do still show up every now and then. The problem is similar to vertical lines, but instead the lines show up horizontally across the screen.
-
How do I fix it? You will have to lift the LCD from its plastic bezel to gain access to the horizontal ribbon cable. This is a much more difficult fix than the vertical lines fix, but it can be done.
- Remove the 2 screws holding down the vertical ribbon cable.
- Carefully pry the LCD free from the plastic bezel using a plastic implement of some sort.
- Prop up the LCD so you can access the horizontal ribbon cable with a soldering iron. The area of interest looks much like the area on the vertical cable underneath the rubber strip.
- Gently run the iron back and forth across this area until the lines disappear. 500° F / 260° C is an adequate amount of heat to use.
Splotchy circles in LCD (after backlight/bivert install)
- What are they? Circles under the LCD that looks like trapped liquid. See this image for an example. This phenomenon is called “Newtonian Rings” and is common in these circumstances.
- How do I fix it? The fix will involve either completely separating the glass LCD from the plastic polarizer layer (air gap) or completely joining them together (adhesive polarizer). See this video from /u/esotericsean for a method of air gapping the polarizer. If you want to join the polarizer to the LCD OEM style, you’ll need a polarizer with pre-applied adhesive. Air gapping is the preferred method. This also applied to Game Boy Pocket.