
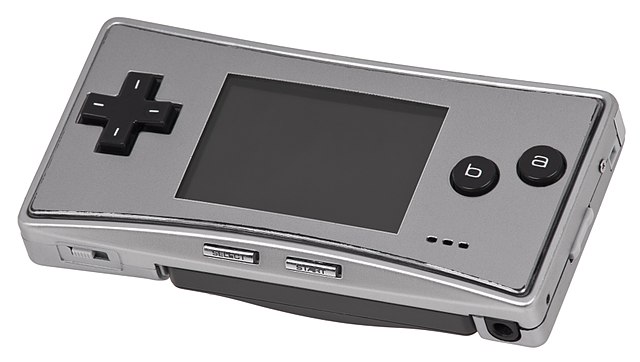
The last Game Boy, released around the same time as the 101 revision of the Game Boy Advance SP. This Game Boy had an incredibly small form factor, going back to the “landscape” design of the original Game Boy Advance. This was the first and only Game Boy to drop backwards compatibility, only playing Game Boy Advance titles. Although released in fewer colours than other models, the Micro instead had face plates that be swapped out to change the look and colour of the front of the system. Finding these face plates in good condition has become difficult, although aftermarket ones are available the quality can be dubious.
Be careful when opening silver systems as we’re aware of cases where the plastic frame is extremely brittle, this doesn’t seem to be an issue for other colours though.
Table of Contents:
Last Content Revision: 2021-11-14
Problems
Don’t forget that the common problems section also has more info, such as failure to power on, speaker issues, or battery issues.
Faceplate does not clip in or does not stay clipped in when installed
- What is it? The plastic frame of some Game Boy Micro consoles are made with defective plastics that tend to get extremely brittle over time. This issue seems most prevalent with Silver colored consoles but may affect or other units as well. See this imgur album for more information.
- How do I fix it? You have three options – If the console is already broken, you can try to use double-sided tape or other adhesives to hold the faceplate on, but the structural damage to the plastic has already been done and any fixes will likely be temporary at best. The only way to “fix” this is to replace the front internal frame of the console with a salvaged OEM frame from another console or a high quality aftermarket replacement. Your second option, assuming it’s only the clips that are broken, is to 3D print some replacement clips. This part should be printable by nearly any FDM printer at home with nearly any rigid plastic filament. Last, you can 3D print a full replacement front frame. Unlike just the clip part, this is not currently printable by most FDM machines and will require SLA or SLS printing. SLS nylon is recommended but SLA resins should work too.
Replacement screen colors are washed out
- What is it? OEM Game Boy screens (all of them, including the Micro) must be calibrated to the console by adjusting the trimpot on the motherboard.
- How do I fix it? Remove the faceplate and right above the “a” button, you should see a small trimpot that looks like a large cross head screw. Adjust that slowly and check to see if the image on screen improves. The trimpot is very delicate and highly succeptible to damage so extreme care must be taken. GO SLOW. If you have access to a flash cart, running the “AGS AGING” ROM (search on TCRF) will make things significantly easier. Nintendo has an internal test tool that can be loaded and one of the images displayed by the tool will cause the LCD to flicker if it is not calibrated. Simply display this image on screen and adjust the trim pot until the image stops flickering.
Mods
- “Makho Battery Mod,” a cheap, high capacity (750+mAh*), and 100% reversable battery mod – Youtube
- Do note that the video uses a lower quality cell. For better battery life, a more reputable 802535 battery vendor is recommended. 602535 also works but is lower capacity but will be perfectly drop-in and will not require removing the foam from the battery door.
-
Overclock mod - written guide with images
- USB C / Micro USB Charge Port Replacement - Example 1 USB C images from sammy.sam and example 2 USB C reddit thread from u/nataliethenerd
- Do note that you lose link port functionality with a mod like this
- AGB Link Port Dongle - github with instructions